
Twitch Streaming Setup: Essential Tools for Success
Table of Contents

Streaming on Twitch can be an exciting way for content creators to engage with a global audience, but having the right setup is important to delivering a professional live streaming experience. First thing, identifying the type of content you create—whether it's gaming, broadcasting, or another niche—is key.
Whether it's your first time or you're a seasoned pro, these essential tools will help you level up your streams, starting with the perfect Twitch streaming setup.
What Equipment Do I Need For a Basic Twitch Streaming Setup?
For a basic Twitch streaming setup, you’ll need a high-quality microphone, a webcam, good lighting, and a reliable internet connection. You should also consider using streaming software like OBS or Streamlabs OBS to manage your Twitch studio stream effectively and engage with your audience seamlessly.
But if you’re ready to invest and take your stream to the next level, keep reading to discover the best stream settings:
Twitch Streaming Setup Essentials

Getting the best settings for your Twitch stream can feel like a challenge, but with a little hard work, you'll be streaming like a pro in no time. The easiest way to start? Tweak your bitrate, resolution, and frame rate to match your internet speed and gear.
With the right setup, you’ll have a stream that shows your audience you’ve put in the effort, all while keeping things looking great and running efficiently.
1. Browser for Multitasking Efficiency
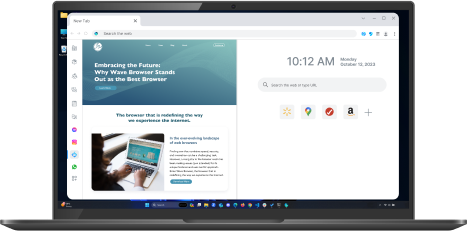
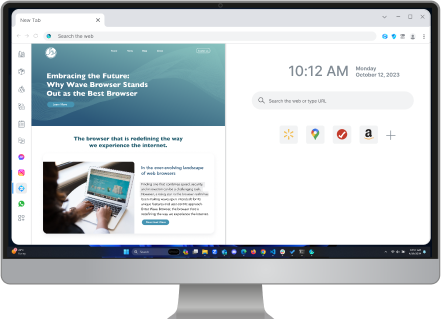
One often-overlooked part of a streaming setup is the web browser you use to manage your stream. A multitask-friendly browser like Wave Browser is perfect for handling multiple tasks without compromising system performance.
With its great features, like a customizable sidebar and smooth tab management, it's the best way to stay organized while streaming, allowing you to keep your Twitch chat room, alerts, and other tools within reach without slowing down your PC.
Here's why Wave Browser should be part of your Twitch streaming setup:
- Lightweight and Fast: Wave Browser is designed to run efficiently, even with multiple tabs open. This is especially important for streamers who need to manage several resources at once—whether it’s checking chat, or accessing external tools.
- Enhanced Privacy: Wave Browser prioritizes privacy, offering features like ad blocking and a secure browsing experience. This helps you stay focused on what you're doing without interruptions from pop-ups or unwanted ads.
- Customizable Sidebar: With Wave Browser, you can pin Twitch chat, Discord, or OBS controls to your sidebar for easy access, allowing you to multitask seamlessly without leaving your main screen.
2. Powerful Streaming Software
The foundation of your setup begins with your streaming software. Popular choices like OBS Studio or Streamlabs give you the ability to customize your streams with overlays, alerts, and scenes, ensuring a dynamic viewing experience.
3. High-Quality Webcam and Microphone
Investing in a high-quality webcam and microphone is non-negotiable for maintaining a professional stream. Viewers expect clear visuals and crisp audio. Consider a Logitech C920 for a budget-friendly option or a Sony Alpha series camera for superior video quality.
For audio, Blue Yeti and Shure SM7B are excellent choices for clear and immersive sound.
4. Lighting for Clarity
Good lighting is key to looking your best on stream. A ring light or softbox lights can reduce shadows and highlight your face, ensuring your audience can easily engage with your reactions and expressions. Proper lighting also reduces the risk of pixelation or poor image quality.
5. A Reliable PC Setup
The heart of your Twitch streaming setup lies in your gaming setup. A high-performance PC with an Intel i7 or AMD Ryzen 7 processor, coupled with 16GB of RAM and a dedicated GPU, ensures that you can handle both gaming and streaming without lag or frame drops.
Whether you're playing the latest video games or creating video game content, the right specs are essential. For gaming PC, the NVIDIA RTX 3060 or AMD Radeon RX 6600 will provide excellent performance, ensuring your computer monitor displays everything in stunning detail.
6. Stream Deck for Quick Control
For streamers who like to have full control over their setup, a Stream Deck is a must-have. This device allows you to assign specific commands to customizable buttons, such as switching scenes, muting your microphone, or triggering sound effects, all with the touch of a button.
7. Comfortable Environment
Comfort is important, as you might spend long hours in front of the camera during your live stream. Invest in a comfortable chair, ergonomic keyboard, and a good mouse that won't strain your wrist. A well-lit, clutter-free desk setup can also help keep you focused on your content and ensure you have a good time streaming.
8. Stable Internet Connection
A stable internet connection is paramount for a smooth streaming experience, especially when dealing with browser issues or fixing black screen problems on Twitch. Ensure your upload speed is at least 3-5 Mbps for HD streaming, and if possible, use a wired Ethernet connection to reduce lag and potential Wi-Fi issues during your stream.
How to stream on Twitch PC

Here’s a step-by-step guide on how to stream on Twitch from your PC, starting with creating an account:
Step 1: Create a Twitch Account
- Go to the Twitch website: Open your preferred web browser and go to Twitch.tv.
- Sign up: Click on "Sign Up" in the top-right corner. Fill in the required fields with your email address, username, and password. You can also sign up using your Google or Facebook account.
- Verify your email: After registration, check your inbox for a verification email from Twitch. Click on the link to verify your account.
- Set up your profile: Once your account is active, add a profile picture, bio, and any other personal details you want to share.
Step 2: Download Streaming Software
- Download OBS: Head over to OBS Studio or Streamlabs OBS. Both are popular and free options available.
- Install the software: Follow the installation prompts and open the software once it's installed.
Step 3: Set Up Your Streaming Software
- Open OBS/Streamlabs: Once the software is installed, launch it.
- Connect your Twitch account:
In OBS, go to Settings > Stream, and choose "Twitch" as your streaming service. Then, enter your Stream Key, which you can find on your Twitch account under Settings > Stream.
In Streamlabs OBS, you can log in directly to your Twitch account through the app, making the connection even easier.
- Set up your scenes: Add scenes for your stream layout. You can create multiple scenes for different views (e.g., your gameplay, webcam, or full-screen display).
- Add sources: For each scene, add sources like your game capture, webcam, or audio. To capture your game, select Game Capture as a source.
- Adjust audio settings: Make sure your microphone and system audio are properly set up, so your viewers can hear you and your game.
Step 4: Configure Your Stream Settings
- Resolution and Frame Rate: Set your resolution (720p or 1080p) and frame rate (30fps or 60fps) based on your PC’s performance and internet speed.
- Bitrate: Choose a bitrate that matches your upload speed. Generally, 2500-6000 kbps is recommended for a good quality stream.
- Test Your Stream: Before going live, do a test to ensure your settings are optimized. Check the video and audio quality, and adjust as necessary.
Step 5: Add Alerts and Overlays (Optional)
- Customize your stream: You can enhance your stream with overlays, alerts, and other graphics. Services like StreamElements and Nerd or Die offer free and premium overlays.
- Add alerts: Set up alerts for new followers, subscribers, and donations to engage with your audience.
Step 6: Go Live
- Start streaming: Once everything is set up, click the "Start Streaming" button in OBS or Streamlabs OBS.
- Monitor your stream: Keep an eye on your stream health via the Twitch dashboard, ensuring that your connection is stable and everything is running smoothly.
- Engage with your audience: Interact with viewers through the chat. Respond to questions, comments, and feedback while you stream.
Step 7: End Your Stream
- Stop streaming: When you're ready to end your stream, simply click the "Stop Streaming" button in OBS or Streamlabs OBS.
- Review your stream: Check out your stream’s performance and viewer engagement stats on Twitch to see how you did.
With these steps, you'll be ready to start streaming on Twitch. Don't forget to follow the community guidelines to ensure a positive and respectful environment for both you and your viewers!
The right Twitch streaming setup is about more than just having the best equipment; it’s about creating a seamless experience that allows you to focus on what really matters—engaging with your audience. By integrating tools like Wave Browser, you can keep your multitasking efficient, your privacy secure, and your workflow streamlined.
Download Wave Browser today, share these tips on social media, and elevate your streaming experience to the next level!
Surf with Ease, Speed, and Security!

Download Wave Browser for a seamless online experience like never before. Try it now!


?")


